I'm posting pics and the pattern now so you all are welcome to it. Update: This pattern will be in Knitting Pattern a Day Calendar 2008. It's April 21st, Earth Day!
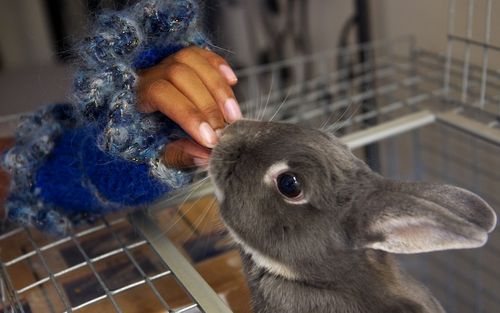
Isn't my bunny Enif cute?
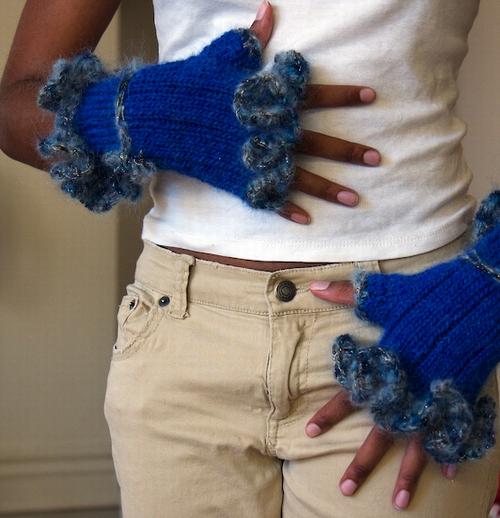
Description: Fingerless mittens with the body knitted in ribbing to stretch to fit the average woman's hand, with big crocheted ruffle trim on top and bottom, and matching crocheted bows at wrist level. No ruffle on thumb or underside of glove to allow fingers to still move freely. For maximum girliness, try it all in pink.
Design: by Nikki Adams
Difficulty level: Intermediate
Materials:
Yarn A: 1 ball Cascade Pastaza (100 grams, 50% wool 50% llama)
Yarn B: 1 ball of Lion Brand Moonlight Mohair in coordinating color (50 grams, mohair blend)
Size 7 / 4.5 mm double pointed needles
Size H / 5 mm crochet hook
stitch markers
Substitutions: Cascade Pastaza is very warm, but slightly itchy. You might try Malabrigo, RYC Cashsoft Aran, or DB Cashmerino Aran . I knit a bit tightly, so other knitters may go with these slightly less bulky yarns to get gauge anyhow.
Substitutes for the Lion Brand mohair could be Trendsetter Dune or Valley Yarns Wildwood.
Size: To fit the average woman's hand.
Gauge: approximately 6 sts=1" / 2.5cm, 24 sts = 4" / 10cm in 4x1 rib with A on size 7 needles (approx. 5 sts/inch in st st), 25 rows = 4" / 10cm in rib, or any yarn/needle combo to give gauge. Gauge is not super crucial as ribbing will stretch.
Notes: You could make the ruffles slightly smaller by using a G (4.25) hook instead. For a slightly different look, weave a ¼ " ribbon around the wrist instead of the crocheted bow.
When number of stitches increase (as while working gusset) or decreases (once gusset stitches are put onto waste yarn), continue working the rib pattern as the stitches lie. That is, do not incorporate the new or lost stitches into the rib pattern; work these in st st.
Glove Body:
Cast on 35 sts with A. Divide over 3 dpns.
Work 4x1 rib (k 4, p 1) around until glove body reaches approximately 4 ½ ".
Begin Thumb Gusset:
Rnd 1: k1, pm, k1, M1, M1, pm. 5 sts between markers. Continue around in 4x1 rib (see notes).
Rnd 2: continue around in 4x1 rib pattern, slipping markers.
Rnd 3: slip marker, k1, M1 a total of three times evenly across sts between markers until you reach last st, k1, slip marker, continue around in 4x1 rib pattern.
Repeat rounds 2 and 3 until you have 14 sts between markers. Repeat Rnd 2 up to the point where you reach the 2nd marker. Slip stitches between markers onto waste yarn. Continue working around in 4x1 rib (see notes) for another 1 ½ ". BO loosely in rib pattern.
Thumb:
Slip sts from waste yarn onto 3 dpns.
For a small thumb:
Pick up 2 sts around the gap between gusset and glove body for a total of 16 stitches. Work in (k3, p1) rib for 3 rounds. BO loosely in rib.
For a medium - large thumb:
Pick up 4 sts around the gap between gusset and glove body for a total of 18 stitches. Work in (k2, p1) rib for 3 rounds. BO loosely in rib.
Crochet Trimmings:
Bottom ruffle: With hook and yarn B, sl st the yarn to join at any point on bottom end of glove body.
Rnd 1: Ch 1, sc in same space, and sc 24sts evenly around this bottom edge (or about 2 crochet stitches for every 3 knit stitches). (25 sts)
Rnd 2: sc in 1st st, *2 sc in next st, sc in next st* around. (49 sts)
Rnd 3: 2 sc in each st around (98 sts)
Rnd 4: repeat round 3 (196 sts). Fasten off.
Thumb edging:
Join B wth sl st, ch1, sc in same space, sc 12 sts around evenly (13 sc). Sl st in ch 1, fasten off.
Top ruffle:
Join B with sl st to align with thumb placement. Ch 1, sc in same sp, sc 24 around evenly. (25 sc) .
For right hand glove:
Turn. Working back and forth in rows now.
Row 1: ch 1, sc in 1st sc *2 sc in next sc, sc in next sc*, repeat from * to * 6 times more. (25 sc on this row). Turn.
Row 2: ch 1, 2 sc in each sc across (50 sc). Turn.
Row 3: ch 1, 1 sc in first sc, 2 sc in each sc across to last sc, 1 sc in last sc. (98 sc) Fasten off.
For left hand glove:
Do not turn, though you will be working back and forth in rows now. Do as for right hand glove from Rows 1-3, omitting the first ch 1 in row 1.
Bows:
Ch 15.
Join ch on top of glove at side opposite that of thumb, around wrist height (approx 2 ¼ " above body bottom).
Sl st loosely across knitting every 2-3 knitted colums (if it helps you do it more loosely, use a bigger hook) all the way around the glove until you reach the point where you first joined the ch.
Ch 15.
Fasten off. Cut off loose ends. Tie the chains into bows.
Weave in all ends and you're done! Try them in pink for the ultimate in girly princess-hood.

1 comment:
Thanks for the pattern. My 7yr old was just asking for some fingerless gloves this morning. Now, if I ever get a chance, I'll make these ones.
Post a Comment